No edit summary |
|||
| Line 112: | Line 112: | ||
=== Team Usage === |
=== Team Usage === |
||
| − | * |
+ | *Run to the beginning and talk to the asura. |
| + | *Place One set of heros and yourself at oneside, and the other 4 on the other. |
||
| − | *'''DO NOT GO NEAR ANY OF THE ASURA!!''' |
||
| − | *Clear Everything in the back |
||
| − | *When you finish clearing, flag your heros in the middle of the hill before the burnt area. |
||
| − | *Run to the beginning and talk to the asura. |
||
*Wait for the quest to update, then run back to the area when it tells you to raze the hive. |
*Wait for the quest to update, then run back to the area when it tells you to raze the hive. |
||
| + | *Clear the left side. |
||
*Run in and kill the 2 bosses. |
*Run in and kill the 2 bosses. |
||
Revision as of 00:16, 11 June 2010
|
This build requires a rating. Please apply the appropriate tag based upon consensus. This build has been designed for the following use: |
This guide uses heroes and henchmen to quickly and easily complete G.O.L.E.M, Against the Charr and A Time For Heroes (ATFH) for Hard Mode Speed Booking.
Overview
- Against the Charr
 / Any Player
 /
/ Fire/runner hero
- / Communing/runner hero
- / Signet of Spirit/resto hero
- G.O.L.E.M
- / Caller
- / Minion Bomber
- {/ Signet of Spirit/resto hero
- / Communing/weakness hero
- A Time for Heroes
- / MS/DB Spammer
- / Bonder 1
- / Bonder 2
- / Bonder 3
Against the Charr
Take the 3 Hero builds mentioned below plus protection henchman and other henchmen of your choice.
Fire/Runner Hero
<pvxbig> [build prof=E/P firem=11+1+1 energ=10+1 comma=10][Fire Attunement][Savannah Heat][Searing Heat][Breath of Fire][Fireball]["We Shall Return!"]["Find Their Weakness!"]["Fall Back!"][/build] </pvxbig>
Equipment
- Armor: Radiant insignias, vigor runes of choice.
- Weapons: Any fire set will do.
Communing/Runner Hero
<pvxbig> [build prof=Rt/P com=11+1+2 spa=10+1 comma=10][Signet of Ghostly Might][Anguish][Pain][Shadowsong][Disenchantment][Boon of Creation]["Find Their Weakness!"]["Fall Back!"][/build] </pvxbig>
Equipment
- Armor: Radiant insignias, vigor runes of choice.
- Weapons: Any high energy set or staff will do.
Signet of Spirits/Resto Hero
<pvxbig> [build prof=Ritualist/Any channelingmagic=12+1+3 spawningpower=3+1 restoration=12+1 ][Signet of Spirits][Bloodsong][Painful Bond][Ancestor's Rage][Spirit Siphon][mend body and soul][spirit light][Protective Was Kaolai][/build] </pvxbig>
Equipment
- Armor: Radiant insignias and vigor runes of choice.
- Weapons: Any staff will do.
Usage
Against The Charr

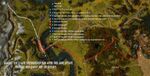
Flag points
- Starting this mission requires you to run to the helmet. Load your favorite running build to get there. (this takes 1 minute to accomplish)
- Once in mission flag your team to point 2. (shown on map)
- Run toward the closest charr to you and let them kill you.
- Once dead, move your team to the different flag points.
- When you reach the bosses,spread your heroes out and flag your henchmen to aggro.
- Don't forget to display your Vanguard title.
- This mission takes 3-5 minutes to complete.
Video Demonstration
300px|right
G.O.L.E.M
Take the 3 Hero builds mentioned below plus protection henchman and other henchmen of your choice or another person with Spiritway heroes. <pvxbig>
Player
<pvxbig> [build prof=?/A deadlyarts=12][Assassin's Promise]["You Move Like a Dwarf!"][Ebon Vanguard Assassin Support]["Finish Him!"][Optional][Optional][Optional][Optional][/build] </pvxbig>
- Signet of Deadly Corruption could be used as a finisher against bosses and stronger targets.
- See Guide:Discordway for more caller suggestions
- Any skill that causes a condition can be substituted for "You Move Like a Dwarf!"
- Ebon Vanguard Sniper Support works, but only against fleshy foes.
- Technobabble can be used to weaken monk walls.
Minion Bomber Hero
<pvxbig> [build prof=Necromancer/Monk deathmagic=12+1+3 soulreaping=8+1 Prot=10][Aura of the Lich][Animate Bone Minions][Death Nova][Putrid Bile][Masochism][Protective Spirit][Aegis][Shield of Absorption][/build] </pvxbig>
Equipment
- Survivor insignias
- 1 Bloodstained insignia
- 40/40 death set
Signet of Spirits/Resto Hero
<pvxbig> [build prof=Ritualist/Any channelingmagic=12+1+3 spawningpower=3+1 restoration=12+1 ][Signet of Spirits][Bloodsong][Painful Bond][Ancestor's Rage][Spirit Siphon][mend body and soul][spirit light][Protective Was Kaolai][/build] </pvxbig>
Equipment
- Survivor insignias
- +health weapons
Communing/Weakness Hero
<pvxbig> [build prof=Ritualist/Any curses=8 spawningpower=10+1 communing=12+1+3][Signet of Ghostly Might][Shadowsong][Pain][Disenchantment][Anguish][Dissonance][Enfeebling Blood][Boon of Creation][/build] </pvxbig>
Equipment
- Survivor insignias
- +Health set
- Staff with +15 energy
Player Skill Usage
- Place a condition and hex on a target and call it so that the heroes will spike it.
- Keep conditions and hexes on the targets for fast kills.
- Cover with Enduring Toxin.
Team Usage
- Run to the beginning and talk to the asura.
- Place One set of heros and yourself at oneside, and the other 4 on the other.
- Wait for the quest to update, then run back to the area when it tells you to raze the hive.
- Clear the left side.
- Run in and kill the 2 bosses.
Notes
- This mission is alot easier with 2 people.
- This should take 5-8 minutes.
A Time for Heroes
Player
<pvxbig> [build prof=any/assas dagger=12][asuran scan][golden phoenix strike][death blossom][moebius strike][you move like a dwarf][i am unstoppable][optional][optional][/build]
- Paragons take [["Never Surrender!"] and [["Find Their Weakness!"]
- Warriors take [[I Will Survive!] and [[Flail]
- Monks take [[Judge's Insight] and [[Vigorous Spirit]
- Rangers take [[Lightning Reflexes] and [[Shadow Refuge]
- Necromancers take [[Blood Renewal] and [[Life Siphon]
- Mesmers drop [["You Move Like a Dwarf!"] and replace with [[Cry of Frustration], take [[Ether Feast] and [[Drunken Master]
- Ritualists take [[Weapon of Aggression] and [[Nightmare Weapon]
- Assassins drop [["I Am Unstoppable!"] and replace with [[Fleeting Stability], take [[Critical Agility] and [[Mystic Regeneration]
- Dervishes, drop [["I Am Unstoppable!"] and replace with [[Fleeting Stability], take [[Mystic Regeneration] and [[Drunken Master]
- Elementalists take [[Frigid Armor] and [[Conjure Frost] (if you do not want to modify your daggers, just swap conjure for a skill of your choice.)
</pvxbig>
Equipment
- Armor: Drop your health as low as possible by adding superior runes. (130 for dervish, 105 for other professions)
- Weapons: Any daggers will do.
Bonder 1
<pvxbig> [build prof=Mo/N blo=2 smi=12+1+3 pro=11+3 div=6+3][Essence Bond][Protective Bond][Strength of Honor][Balthazar's Spirit][Life Bond][Blessed Signet][Offering of Blood][Signet of Devotion][/build] </pvxbig>
Bonder 2
<pvxbig> [build prof=Mo/N blo=8 hea=11+1 pro=9+1+3 div=8+1][Essence Bond][Protective Bond][Mending][Succor][Blessed Signet][Blood is Power][Signet of Rejuvenation][Signet of Devotion][/build] </pvxbig>
Bonder 3
<pvxbig> [build prof=Mo/P pro=12+1+3 div=10+1 comma=8][Essence Bond][Protective Bond][Life Barrier][Watchful Spirit][Blessed Signet][Signet of Devotion]["Never Give Up!"]["Fall Back!"][/build] </pvxbig>
Usage
- Make sure you have your delver title displayed.
- Before having the heroes start enchanting you, check for Destroyer of Deeds as they have Punishing Shot.
- Killing the Great Destroyer is still possible with Deeds around, it will just become more difficult.
- Interrupt Lava Wave with "You Move Like a Dwarf!" (or Cry of Frustration for Mesmers)
- This mission can be done in about 1 minute.
Notes
- To obtain multiple copies of books, you need to place new books into storage. (you only receive one book at a time)
- Credit goes to the first book in your inventory.
- To save some time, you can swap out your first book to a book that hasn't recieved credit for the mission.
Video
- Youtube, streaming - using the same concept but different builds.
See Also
- Build:Any/A ATFH Runner
- Build:A/any GW:EN Speedbooker